Docker & Kubernetes: The Practical Guide! - Docker basics (Section 1)
Docker is a platform that uses OS-level virtualization to deliver software in packages called containers. In short, It's a platform for developing, shipping, and running applications. It enables developers to package their code and dependencies into a standardized unit called a container. Containers are lightweight and portable, and they can run on any platform that supports Docker. Docker is based on the concept of containers, which are isolated environments that run on a host operating system. Each container has its own file system, networking, and processes, and it can be started, stopped, and scaled independently. This makes it easy to deploy and manage applications, and it also helps to improve security and reliability.
Images
Images are one of the two core building blocks Docker is all about (the other one is "Containers").
Images are blueprints / templates for containers. They are read-only and contain the application as well as the necessary application environment (operating system, runtimes, tools, ...).
Images do not run themselves, instead, they can be executed as containers.
Images are either pre-built (e.g. official Images you find on DockerHub) or you build your own Images by defining a Dockerfile.
Dockerfiles contain instructions which are executed when an image is built ( docker build . ),
every instruction then creates a layer in the image. Layers are used to efficiently rebuild and
share images.
The CMD instruction is special: It's not executed when the image is built but when a container
is created and started based on that image.
Containers
Containers are the other key building block Docker is all about.
Containers are running instances of Images. When you create a container (via docker run ), a
thin read-write layer is added on top of the Image.
Multiple Containers can therefore be started based on one and the same Image. All Containers run in isolation, i.e. they don't share any application state or written data.
You need to create and start a Container to start the application which is inside of a Container. So it's Containers which are in the end executed - both in development and production.
Key docker commands
For a full list of all commands, add --help after a command - e.g. docker --help , docker run --help etc.
Also view the official docs for a full, detailed documentation of ALL commands and features
Important: This can be overwhelming! You'll only need a fraction of those features and commands in reality!
-
docker build .: Build a Dockerfile and create your own Image based on the file.-
Run the above command after navigating to the desired
Dockerfilelocation (saycd node-app/). Docker uses the Dockerfile of the current folder -
-t NAME:TAG: Assign aNAMEand aTAGto an image, tag can be straing or numberdocker build . -t my-web-app:latest
-
-
If your Dockerfile is in a different folder, specify it explicitly with:
docker build . -t my-web-app -f subfolder/Dockerfile
eg.
docker build . -f node-goal-app/Dockerfile
-
docker run IMAGE_NAME: Create and start a new container based on imageIMAGE_NAME(or use theimage id)--name NAME: Assign aNAMEto the container. The name can be used for stopping and removing etc.-d: Run the container in detached mode - i.e. output printed by the container is not visible, the command prompt / terminal does NOT wait for the container to stop-it: Run the container in interactive mode - the container / application is then prepared to receive input via the command prompt / terminal. You can stop the container withCTRL + Cwhen using the-itflag--rm: Automatically remove the container when it's stopped
docker run -it --rm --name my_app IMAGE_NAME
docker run -d -p 3000:80 --rm --name my_app IMAGE_NAME -
Running external(Pre-built) Images:
docker run node
-
The above command will use docker image from docker hub, failing to locate locally. Then it'll create container (running instance of image). Image name or ID should match locally or remotely (say docker hub, private registry)
-
docker start my_container: Starts the stopped container with the name 'my_container' or ID, not a new container. It'll start with detached mode by default.-a: attach tag-i: interactive tag, sodocker start -a -i my_container
-
docker stop my_container: Stops the running container with the name 'my_container' or ID -
docker attach container_name: Will attach the container again -
docker logs container_name: Will print logs by the container-f: follow tag will attach it again to print the future logs in terminal
-
docker ps: List all running containers-a: List all containers - including stopped ones
-
docker ps -f status=exitedwill list only stopped containers.-for--filter -
docker images: List all locally stored images -
docker rm CONTAINER: Remove a container with nameCONTAINER(you can also use thecontainer id). You can use multiple container name or ID followed by white space. SOdocker rm CONTAINER_1 CONTAINER_2 CONTAINER_3 -
docker rmi IMAGE: Remove an image by name / id. You can use multiple image name or ID followed by white space. -
docker container prune: Remove all stopped containers -
docker image prune: Remove all dangling images (untagged images)-a: Remove all locally stored images
-
docker push IMAGE: Push an image to DockerHub (or another registry) - the image name/ tag must include the repository name/ url -
docker pull IMAGE: Pull (download) an image from DockerHub (or another registry) - this is done automatically if you justdocker run IMAGEand the image wasn't pulled before -
docker image inspect image_ID: prints the info. about image
Info about Dockerfile
# Every instruction is a layer in docker image
# Every instruction in an image creates a cacheable layer - layers help with image re-building and sharing.
FROM node:20.10.0
# FROM - specifies the base(parent) image.

WORKDIR /app
# WORKDIR - sets the working directory for the instructions that follow.

COPY package.json /app
# COPY - copies files and directories to the container.
# copies `package.json` to `/app` inside conatainer

RUN npm install
# RUN - runs a Linux command. Used to install packages into container, create folders, etc

COPY . /app

EXPOSE 80
# EXPOSE - expose ports. Mostly it doesn't work. We have to configure while running the image as below
# docker run -p 3000:80 IMAGE_NAME
# 3000 - local port under which we want to access in our local machine
# 80 - internal docker container exposed port; -p publish

CMD ["node", "server.js"]
# CMD - provides a command and arguments for an executing container. There can be only one CMD.
Copy files/folders between a container and the local filesystem
docker cp [OPTIONS] CONTAINER:SRC_PATH DEST_PATH
docker cp [OPTIONS] SRC_PATH CONTAINER:DEST_PATH
docker cp --help is for more help
- Let's imagine
node-apphas one folder nameddummywhich a file namedtest.txt. And we have to copy it inside the container namemy_containerinside the foldertest.docker cp dummy/test.txt my_container:/testordocker cp dummy/. my_container:/test- If you want to copy the
testfolder from docker to local computer insidedummyfolder,docker cp my_container:/test dummy
- Renaming(cloning) built image:
docker tag current_name:tage_name new_name:tag_if_needed
Docker Images and Containers


Docker Image's public URL
- actionanand/node-app
- actionanand/node-goal-app
- actionanand/python-random-app
- actionanand/python-bmi-app
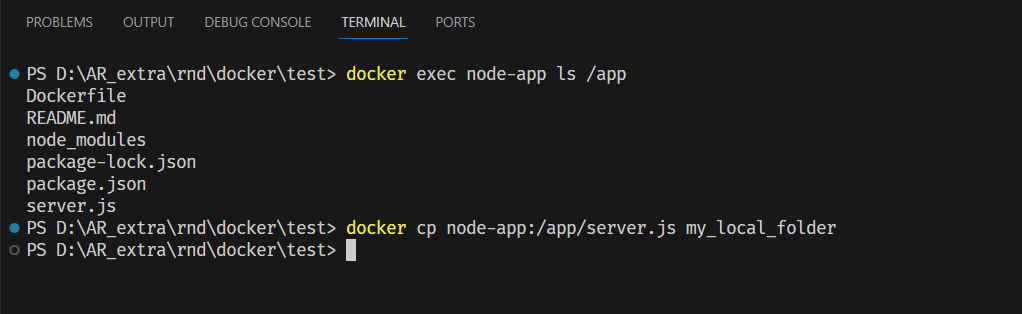
How to see the files inside docker image
- Run the image into the container
docker run --name <container_name> <image_name>
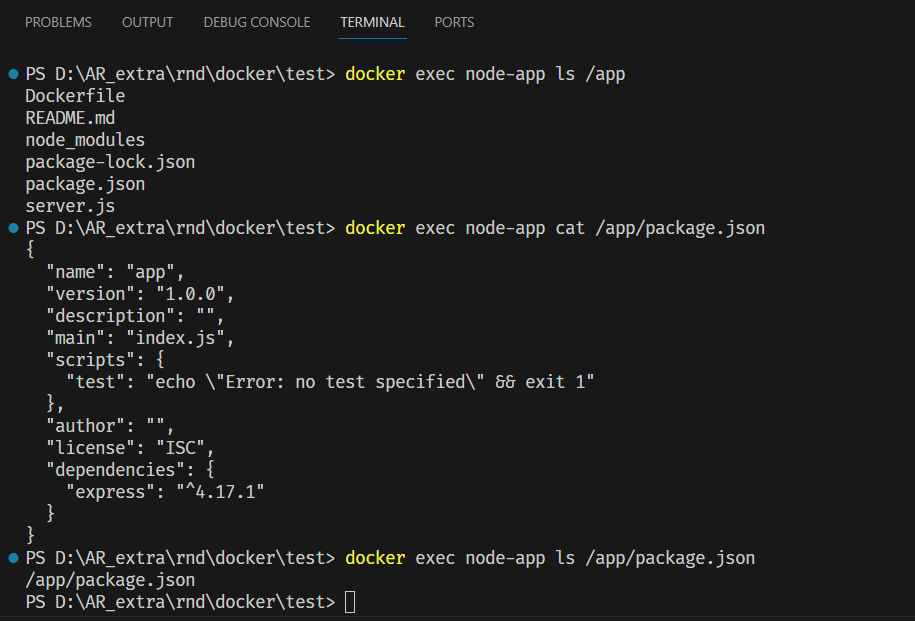
- Once the container is running, you can use commands such as
lsorcatto view the contents of the container
docker exec <container_name> ls /
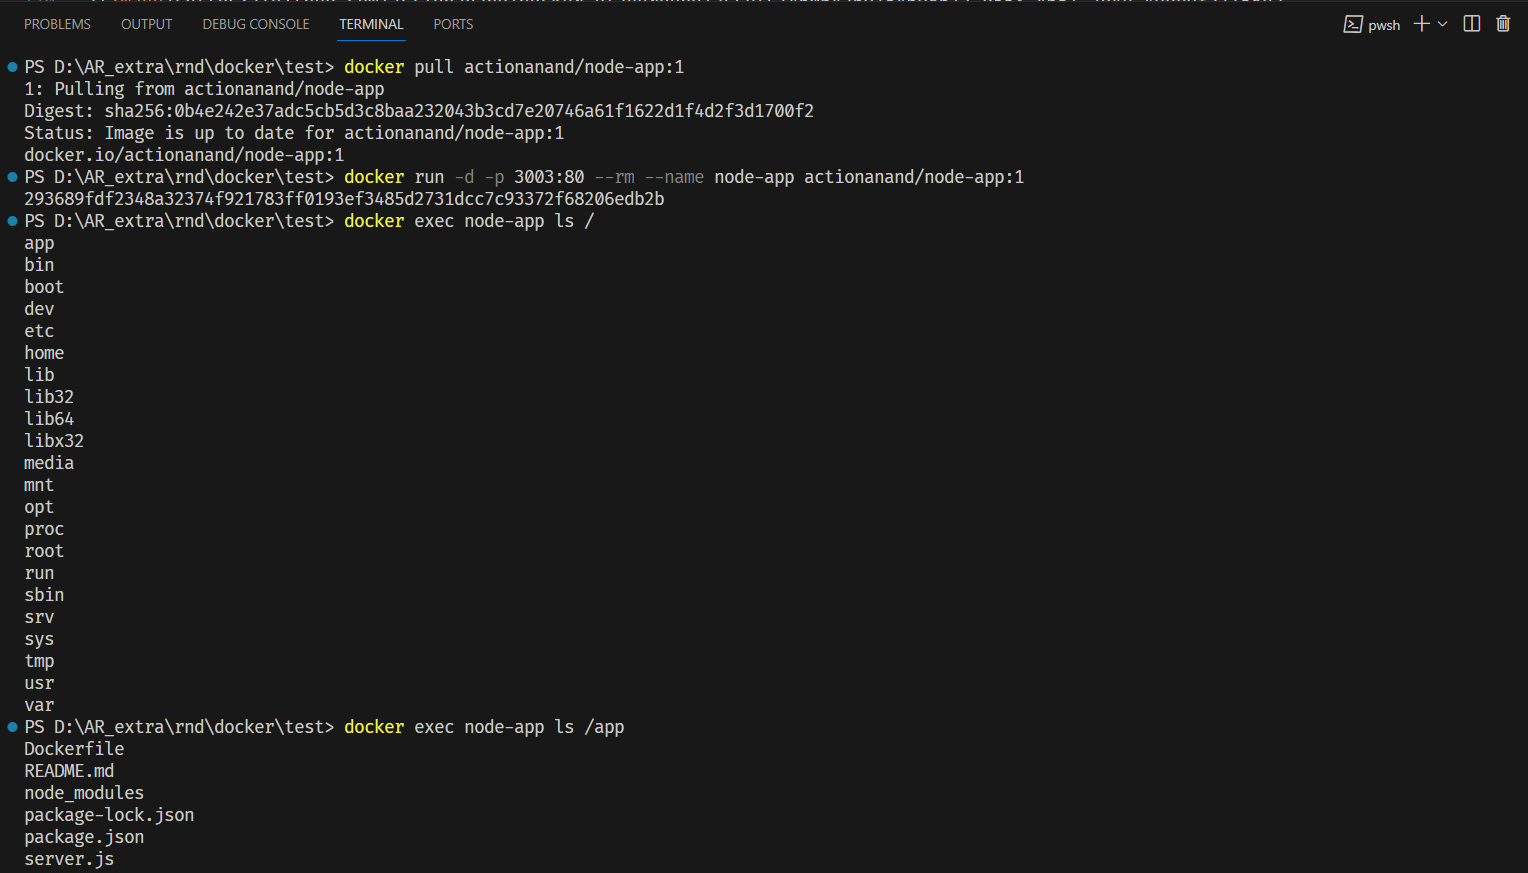
docker exec <container_name> cat /path/to/file
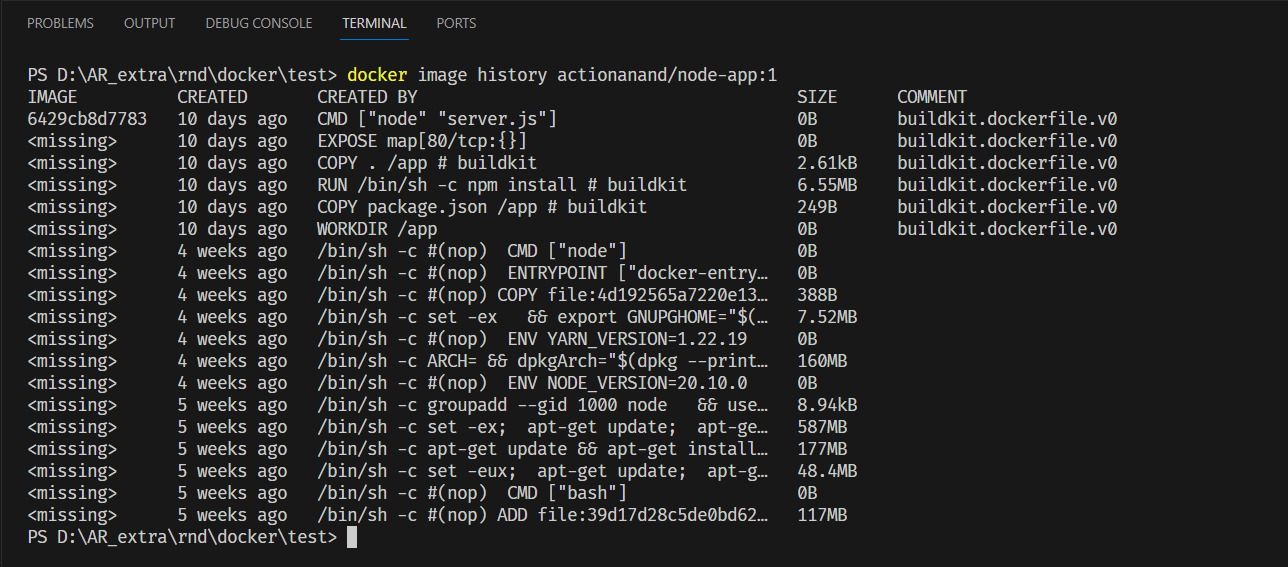
- To view the docker image history
docker image history my-image:latest